|
<< Click to Display Table of Contents >> Dialog |
  
|
|
<< Click to Display Table of Contents >> Dialog |
|
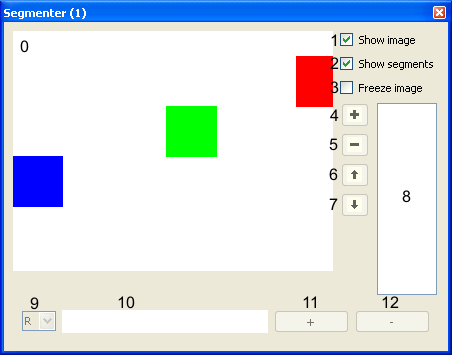
Button/Display |
Description |
0 |
Display of the input image and of segments found |
1 |
When checked the input image is displayed |
2 |
When checked found segments are display |
3 |
When checked the current input image is hold |
4 |
Add the current selection in the input image to the list of segments |
5 |
Delete a segment |
6 |
Move segment up |
7 |
Move segment down |
8 |
List of segments |
9 |
Selector of the color channel for segment optimization |
10 |
Display of values within the selected channel of the currently active segment |
11 |
Close gaps within the values of the selected channel |
12 |
Thin out values of the selected channel |
To recognize the red square as a single segment, mark a region within the red square with the mouse.
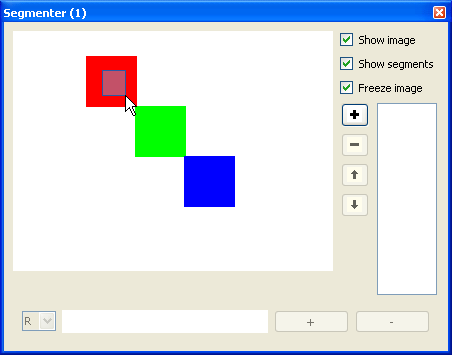
Click onto the + (button 4) to add your selection to the list of segments.

The center of gravity of the segment is displayed with a cross. When the image is changing (deactivate the Freeze image checkbox) the center of gravity moves with the red square. Now repeat the procedure to add the green square to the list of segments.
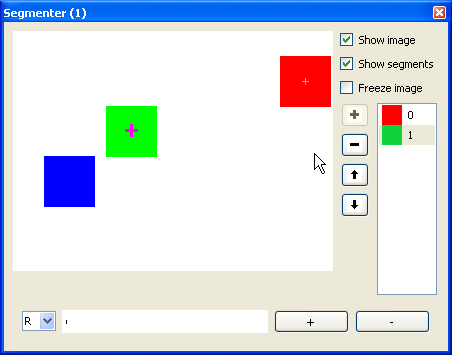
Now there are two segments within the list of segments. The currently selected segment is marked with a bold cross.