|
<< Click to Display Table of Contents >> Structure and concept of user interface |
  
|
|
<< Click to Display Table of Contents >> Structure and concept of user interface |
|
When starting up Robotino® View an empty project with a single "Robotino" device is opened. The complete workspace is taken up by the project.
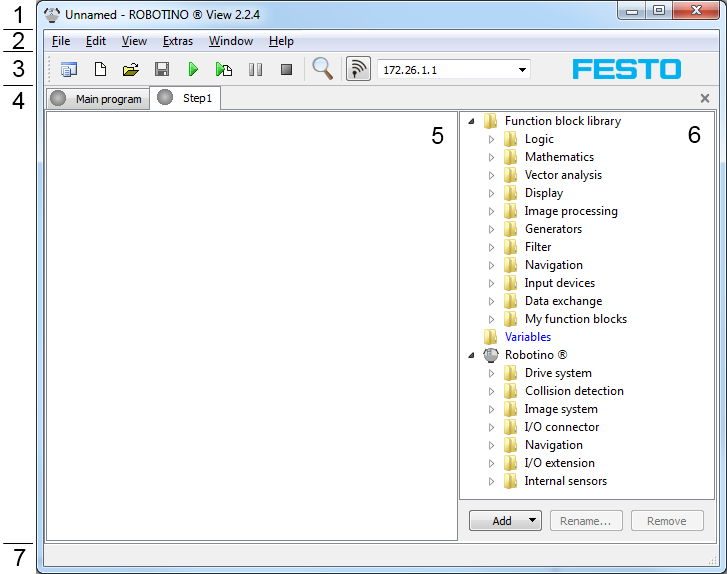
Number |
Name |
Description |
||||||||
1 |
Title bar |
|
||||||||
2 |
Menu bar |
Menus to load/save, edit, view ... |
||||||||
3 |
Tool bar |
|
||||||||
4 |
Program selector |
Here you can switch between the main program and the subprograms of a project. The subprogram "Step1" is visible at present. |
||||||||
5 |
Program workspace |
Here the program is viewed and edited. The workspace can be scaled up and down with F3 and Shift + F3 or the corresponding commands in the View menu. Alternatively the magnifier function can be user: after activating the tool the workspace can be scaled up or down by using the left or right mouse button or the mouse wheel. Obviously, the subprogram "Step1" is empty. |
||||||||
6 |
The function blocks available for programming are displayed here. |
|||||||||
7 |
Shows information about project and application status. |